


New Login Enterprise Feature: Script Editor
January 8, 2021
The most recent Login Enterprise release added a new feature: Script Editor
In this blog, we will describe the benefits and functionality of the Script Editor.
Script Editor
For the full documentation, please refer to the Help Center article.
Script Editor is a standalone application that is download-able from the Login Enterprise virtual appliance. It can help with getting up and running quickly to scripting for testing applications of your choice. The Script Editor is suitable for those new to scripting due to the minimal UI and tool light-weightiness.
To get started when the Script Editor .exe is launched on the host with the Application to create a script against, click on Create a new Login Enterprise Application button:
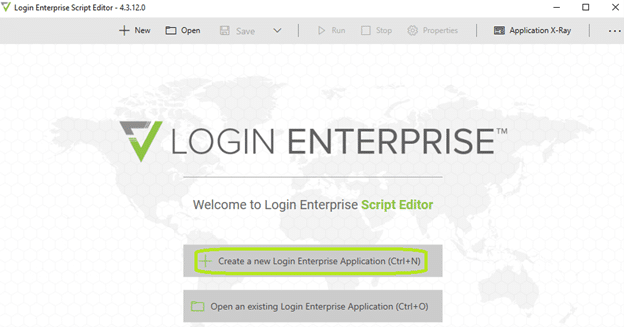
To get started, click the “Create a new Login Enterprise Application” button
Fill out the fields in the popup. The Script Location is where the Script Editor will create the files. Choose Application for desktop application type (more on Browser later). Target is the path/statement that, when executed, will start the Application in the desired fashion. For example, in the screenshot example using notepad, if “notepad” is running in a Windows Run dialog window, it will result in the notepad.exe Application running:
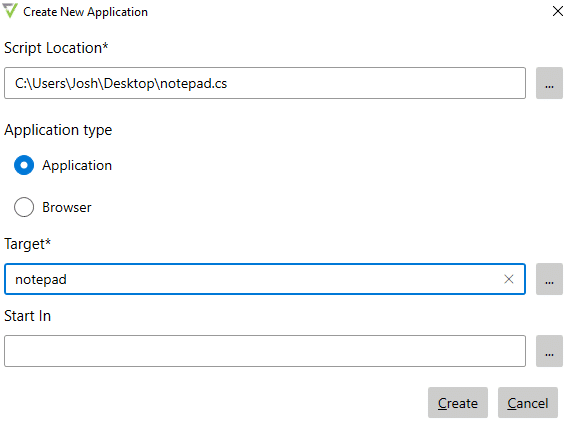
If “notepad” is running in a Windows Run dialog window, it will result in the notepad.exe Application running
Once you click the Create button, it will generate files in the defined Script Location path:
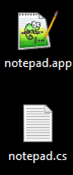
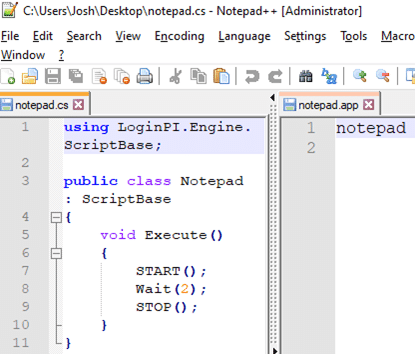
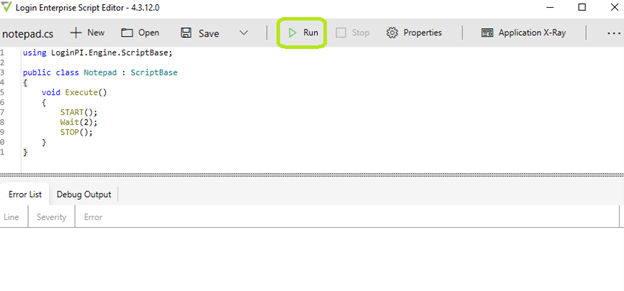
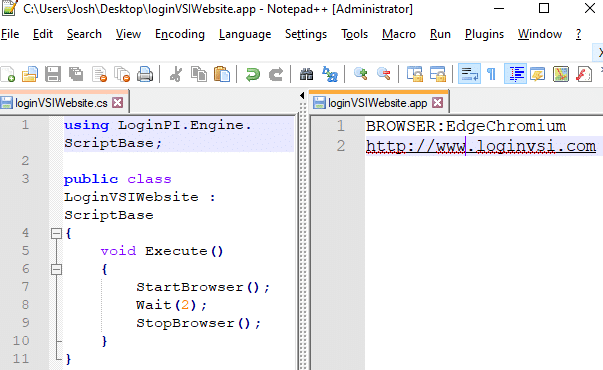
These files contain what was in the Target field; this gets placed in the .app file. And, in the .cs file that gets created will be the meat-and-potatoes of the script execution. The Script Editor will already put some basic functions in it to get started: will start the Application, wait a couple of seconds, then stop (close) the Application:
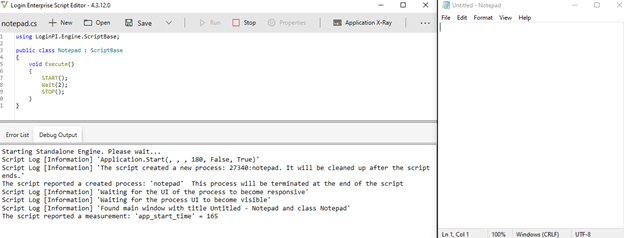
To see how the automatically-generated quick script runs, click on the Run button in the Script Editor GUI:
Note, in my case, the notepad.exe gets started, and there is some text output in the Debug Output tab of the Script Editor with some helpful information about the script running:
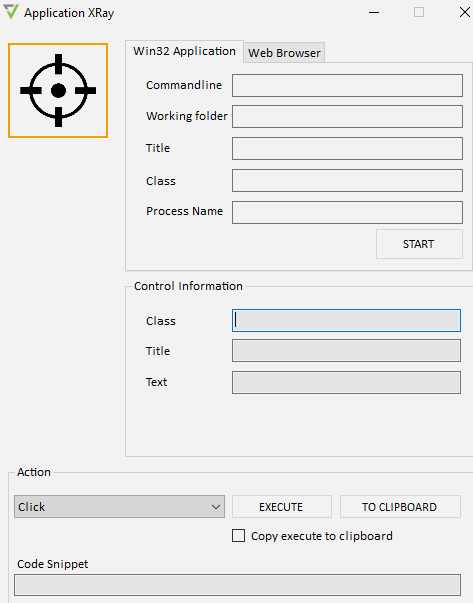
If you click on the Application X-Ray button in the Script Editor GUI, it will open the Application X-Ray tool. This tool is used to line-by-line write the workload script on the defined interactions with the Application you’re writing the workload to test. For all the scripting functions, please refer to Scripting Function documentation.
Also, web browser automation is supported! (For the full documentation, refer to The Application XRay: Web Browser Functions Explained.) To do this, go into the Create New Application window. In this case, select the Browser Application type instead of the default Application selection, choose the Browser and version in the Browser drop-down menu, and input the URL for the web browser to initially navigating to, once opened:
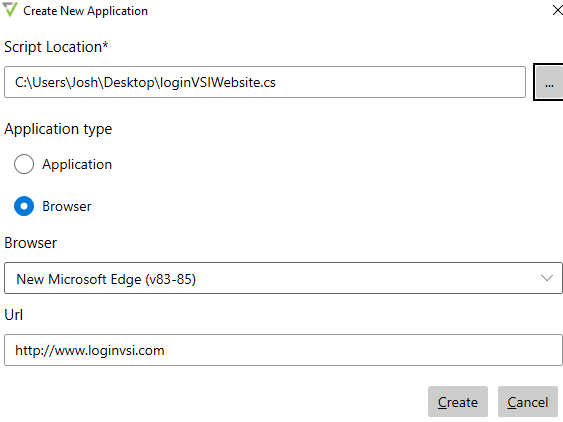
After the Create button is clicked similarly to before, the .cs (minimal script) and .app files get created. Note, this time, the contents of the .app file reflect different information: the web browser type/version and the initial URL to navigate to:
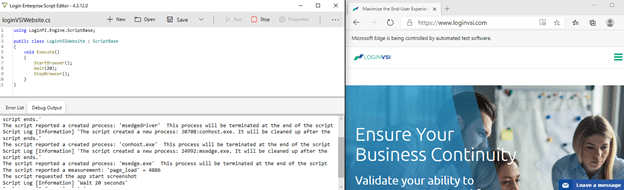
Back in the Script Editor GUI, click on the Run button. This time the defined web browser will launch, navigate to the specified URL, and there will be some helpful text output in the Debug Output tab in the Script Editor of the running of the workload:
As shown, to get started with your workloads is pretty easy! For more information or a demonstration, please contact us!
Login Enterprise ReleaseScript Editor

